
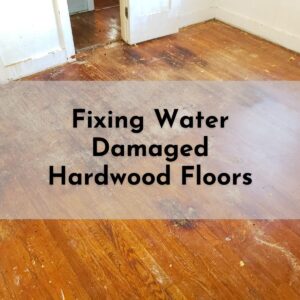
 Hardwood floors are a beautiful floor-covering choice for homes and businesses. They are durable and luxurious and are a popular flooring option for interior designers and decorators. Hardwood floors, however, can be easily damaged when exposed to water and moisture.
Because wood is porous, wood will absorb any water on its surface. When the water permeates the wood floor, it causes it to swell and buckle and can destroy hardwood flooring. The wood flooring will appear cracked and stained and if left untreated, may not be salvageable and beyond repair.
Water emergencies, such as leaks from appliances or a roof, can quickly wreak havoc on hardwood floors. It is essential to take swift and decisive action if water has reached your floorboards – even minor signs of damage should not be neglected! After the necessary drying process, you may need to repair or replace planks that have become compromised by too much moisture.
Read ahead for helpful tips on how to keep your hardwood floors safe from water damage and what measures you should employ in case it’s already been damaged by excess water.
Preventing Water Damage to Hardwood Floors
If you’ve experienced a water leak or flood on your wood floors, it’s important to take quick action to avoid costly repairs and stay ahead of a mold problem. Whether it was a small leak from a faucet or a flood caused by a storm, the first 24 hours are critical. With years of emergency restoration experience, our team has found the following restoration tips are important to prevent water damage to hardwood flooring.
Determine the Source of Water Damage
Before diving into the drying process and repairs, it’s critical to determine the source of the water damage. Did the water source come from a leaking ceiling? Was the water damage caused by a leaking appliance such as a refrigerator? Some refrigerator water filters will degrade over time and cause a small, persistent drip of water. Over time, this small leak can turn into a big mess for wood flooring. Check for leaks in and around the affected area so you can repair the water leak before starting the drying process.
Remove Water-Drenched Objects from the Floor
As soon as possible after you’ve identified and stopped the source of the water, remove any water-soaked items off of the hardwood flooring to start the drying process. Rugs, furniture, and other items should be moved to another area of the home or business. If possible, place the damp items outside in a warm, sunny spot to dry out. Leaving the items in the water-damaged affected area will slow down the drying process and may accelerate mold growth.
Remove Excess Water
After removing the water-drenched items from the area, you will need to remove any excess standing water. The cellulose fiber in wood flooring absorbs water quickly so it’s important to remove surface water as soon as possible.
For smaller amounts of water, you may be able to remove the excess water with mops, towels, and clean rags. For more than a few gallons of water spillage, you should use a wet vacuum to pull the water out of the flooring. Wet vacuum hoses and flooring attachments are great tools to pull water out of the pores and seams of flooring.
Clean the Flooring
It may sound counter-intuitive to use water and additional liquid on wood floors after a spill or water loss, however, there may be dirt and debris leftover from the original water source. This dirt and debris may get stuck in the wood planks and seams and cause bacteria growth.
Use a cleaner designed for wood floors, scrub the floors with a stiff brush to remove dirt, mud, silt, and organic material. Once you’ve cleaned the floor, run the shop vacuum over the area again. Wear rubber gloves to protect your skin from both the water-soaked flooring and the cleaner.
Dry the Wood
Even if you’ve removed the excess water and the flooring appears dry after using the wet vacuum, there may be areas out-of-sight that are still wet and have a moisture problem. The water can soak through the wood planks and could potentially impact the subflooring.
To find and remediate this floor moisture, place a fan dehumidifier in the middle of the room on the highest setting for at least 24 hours. In addition, place fans around the perimeter of the room and position them so they create a constant airflow on the surface of the floor. If possible, also place fans in the room directly below the water-damaged area and point them towards the ceiling. These fans will help dry the subfloor from below and mitigate extensive flood damage.
Search for Mold
Aside from having to replace the entire water-damaged flooring, the biggest headache for home and business owners after a water emergency is mold. Since mold loves moisture, it can thrive in, under, and around water-soaked areas. Once the area is completely dry, look for a white powdery coating or signs of early mold growth.
If you see signs of mold, you can remove it using several methods and using products you may already have in your cleaning product inventory. For stubborn mold discoloration and mold removal, clean the affected area with TSP, trisodium phosphate, or a TSP substitute water mixture.
Check for Moisture
After several days of trying, use a moisture meter to determine how much moisture is left in the flooring. Acceptable moisture content in wood flooring is between 2-4% of the subfloor moisture level. Don’t be surprised if the moisture level is high the first time you test – wood floors can sometimes take weeks to completely dry out.
To Replace or Repair?
If you are comfortable repairing and installing hardwood floors, there are several steps to make the process easier and you can find some step-by-step guides on YouTube. In general, here are the steps to take to repair water-damaged hardwood floors:
- Step 1: Identify which planks need to be replaced and remove them. Look for planks that are visibly damaged with water. Remove these planks first and inspect the surrounding planks for moisture. Pay particular attention to planks that appear concave or convex; this is also called cupping. Cupping happens when water or water vapor affects floorboards from below. Another issue to watch for is crowning. Crowning is when the floorboards are arched in appearance with the middle higher than the edges. Cupping and crowing are key indicators of water damage.
- Step 2: Ensure the floor underneath is dry. Before replacing the affected planks, you need to make sure the subfloor is dry. If you’ve identified any moisture in the subfloor, continue using the drying methods previously mentioned before moving on to additional steps. If you cover the subfloor with new wood and it is still wet, you may make the water issue worse and cause damage to the new flooring.
- Step 3: Install new solid hardwood flooring planks. Once you are certain the area is completely dry, you can install the new wood planks. Depending on the replacement flooring manufacturer, you may need a pin-nailer, cordless drill, and miter saw to get the job done.
- Step 4: Sand the entire floor. To ensure a uniform and professional appearance, sand the entire floor of the room, not just the area with the replacement planks. This will give the room a fresh, new look and appearance. A drum sander is the best tool for this job; if you do not have one in your DIY inventory, most big-box hardware stores rent drum sanders.
- Step 5: Stain and seal the wood flooring: The final step to repair a wood floor is to stain and seal the wood floor. The upside of having to redo your wood flooring is you can choose a different flooring finish color if you’d like! After you stain the floorboard, finish this step with a polyurethane coating to protect your floors from wear and tear.
Pro tip: laminate flooring is not the same as hardwood flooring. Some laminate flooring looks like wood but is actually made of melamine resin and fiberboard material. There are different steps to repair water-damaged laminate floors than traditional hardwood floors.
Learn About Our Water Damage Restoration Services
Water Damage Restoration from Reynolds Restoration Services
The Reynolds Restoration Services team of certified, trained water restoration professionals uses state-of-the-art drying machines and methods to repair the damages caused by water. Our team has more than 17 years of experience repairing water-damaged floors and can help you with your project.
Repairing hardwood floors can be a complicated process, and we recommend engaging with a restoration company to help you minimize repair costs. Professional restoration companies have the experience, patience, and tools to get the job done right. Many home and business owners call us long after it’s feasible to repair hardwood floors so be sure to take quick action if you are not able to do the work yourself.
At Reynolds Restoration Services, we help repair and restore water-damaged hardwood floors to their pre-loss condition for both home and business owners. We know how stressful a flood or water emergency can be and work hard to finish our work efficiently and professionally so our clients can get back into their homes or businesses quickly.
Our team of certified and trained water damage technicians is on-call 24/7 and can be on-site to assess damages and begin repair work quickly. Our team also includes skilled flooring experts and carpenters who have experience working with hardwood floors.
If you’ve had a recent water loss and your floors need some help, don’t take on the stress of trying to save your hardwood floors yourself – let us do it for you. Call us at 1-888-277-8280 for quick service! While we hope you don’t need us, we are here just in case you do.
About Reynolds Restoration Services
Reynolds Restoration Services is the premier commercial and residential disaster restoration and reconstruction company in the Harrisburg, PA, Philadelphia, PA, Fairfax, Va, Arlington, VA, and Maryland/DC service areas. Our qualified and dedicated staff are always on call to respond to fire, smoke damage, storm, water, and mold remediation. Our mission is to Respond and Rebuild with Care on each and every project.

President of Reynolds Restoration Services. Over 20 years of experience in the emergency restoration industry.